Archive for the ‘from the shop’ Tag
Here’s the question: can I take the boards from the router to the sander to hand sanding to finish application today? Tomorrow morning would then be the beeswax/mineral oil topcoat, and tomorrow afternoon would be installing the non-skid feet with stainless steel screws, wrapping and labeling. Tomorrow evening … load the cars, and avoid the trick-or-treaters.
And I’m pretty sure the random orbital sander will die today.
Oh, and I have to build the display units in my spare time.
Possible?
Yesterday’s funk has left me, which is good. I’m through the wall. Now, it’s all about taking my productivity up a notch and getting to the finish line. (HA. I kill me.)
8:20a: in the shop. Time to process the final glue-ups from yesterday and get going with sanding.
10:07a: Done with smoothing on the planer now … but that took too long.

Pre-planed … hardened glue and an uneven surface gotta go.

Here’s the smoothed surface. Perfect for sanding for a glass-smooth finish now.
10:20a: Router table now set up for edge rounding.
11:02a: 440 edges now rounded. Time to route the handles … but oh NO, the dust collector is full. Time for my dust mask & the worst job in the shop. The result: a 500 ml bag & a 33 gallon bag of sawdust (and no, I have no idea why I’m mixing my measurement systems).

Here are the old filters from the dust mask … this is the stuff I didn’t breathe.
12:15p: 110 handles routed.
12:33p: lunch and errands. I need to restock the ice cream and diet coke. Man does not live by woodworking alone.
2:34p: back to the shop; time to begin sanding. Corners will be rounded, and I’ll clean up the routed edges as well. That’s 220 corners and 440 edges, by the way.
3:43p: Rounding done and coughing begins. Break needed.
4:10p: Sanding with the random orbital sander begins. I start with 80 grit.
5:17p: I may never finish (HA. I kill me.).
7:28p: done with 80 grit. Break.
7:46p: Begin with 120 grit. All the boards, all over again. And I’ll do this with 5 different grits. Why? Because the # 2 comment made about my boards (after “Oooh, pretty”) is “Oooh, smooth.”
8:56p: Done with 120 grit. I’m giving up … and no, I didn’t break the sander, and I didn’t make the finish line today. That will have to wait for another day.
Good thing I have another day.
Staycation: day 5 results:
- 55 boards now sanded through 120 grit
- 12 boards now on hold “for next time”
- zero boards cut for the new display units
Forecast for day 6: a good chance of rain, so whatever I get done tomorrow gets done in the shop. And, I have NO ROOM.
More
Staycation: Day 1
Staycation: Day 2
Staycation: Day 3
Staycation: Day 4
Every significant accomplishment has one: that point at which you question what you’re doing. Is it worth it? Can you do it? Should you do it?
When I ran my first marathon, I hit the wall in the 20th mile.
On my staycation, I hit the wall on day 4.
1:41a: I decide I’m not thinking big enough. I must make more boards.
4:22a: The new display units are vexing me. I need to get those done and out of my head.
7:12a: I go to Home Depot to pick up epoxy, masking tape and boxes to put my finished boards in.
8:35a: in the shop.
9:32a: first glue-up done. I’m relaxing to JT. Life is good.

10:16a: I’m done playing Jenga. I picked up the cutoffs that were “stored” in 7 places and placed them in this newfangled thing I bought: a container. Wow. Organization. What a concept. Now, it’s time to plane and cut to shape the new boards.

I have too much lumber … and never in the right size.

Rolling cart # 1 for off cuts … full.

Rolling cart # 2 for off cuts … full.

Organization helps. Problem: containers # 3, 4 & 5: full. I do have a couple of ideas on how to use these off cuts … but I have no time today. Or this month. Or this year.

On to the planer to process the glued up boards.
11:18a: the planer blades are done. I’ve got new blades waiting for this moment. Unplug the tool. Read the instructions conveniently on the back of the new blades. Unscrew 31 screws, replace the 3 blades, and then put it all back together.
11:50a: had to be done … but I don’t have time for this! But … the planer is now working, and the blades are so sharp, the boards are coming out like I have already sanded them smooth.
1:05p: I’m progressing, but not nearly fast enough. I was supposed to make serious progress on the two new display units today … but I’m just not feeling it. At all. To make the display units, I need to do another deep dive into the lumber pile. No motivation. So, lunch.
2:01p: back to the planer.
4:09p: 40 boards, now ready to finish. That’s great … but I’m not getting the display units done. I am not feeling it. At least I’m getting the boards ready for finishing tomorrow.
4:58p: second glue session almost done.
5:05p: gotta take a break. And a nap. I’m on staycation.
7:40p: back to the shop. Third glue session.
8:41p: lights out.
Staycation: day 4 results:
- 9 more boards picked and processed
- 59 boards now glued up
- 67 total boards now in production

More
Staycation: Day 1
Staycation: Day 2
Staycation: Day 3
8:48a: enter the shop
9:08a: do a joint test. I snap an end cut. There’s only a 1/4″ glue joint … but it holds. The wood breaks. That’s a good thing: these boards will not be coming apart.
9:32a: first wood cascade of the day. I have NO ROOM.
9:48a: first glue-up done

Note to self: the next time Velda suggests you buy more clamps, say “Yes, Dear.”
10:24a: first 2 boards picked & processed.
11:32a: throwing things again. Earlier, today.
11:37a: my new plunge router arrives. Now, if I just had time to unpack it….

Love my new Makita RP2301FC 3-1/4 HP Plunge Router (Variable Speed) . Thank you, Amazon Prime!
11:42a: a handle just fell off my table saw. Tool envy, no doubt.
11:55a: I lose at Jenga. As if that’s a surprise. I have NO ROOM.
12:23p: More cut-offs delivered to the curb for mulch. Note to Velda: this is pizza fire starter wood that we’re not using. More pizza is needed!

Pizza! Pizza! Pizza!
1:58p: 2nd glue-up of the day done
2:57p: time to dive for more Black Walnut.
3:47p: I’m now out of 8/4 Hard Maple … but my last custom order is ready for glue-up.

Take heart, Brian! Your board is progressing in the shop, honest!
5:24p: last board is picked & processed.
6:10p: 3rd glue-up done.
6:17p: shop swept. Music off. Lights out.
Staycation: day 3 results:
- 20 more boards picked and processed
- 28 more boards glued up
- 58 total boards now in production
I have NEVER produced like this!
More
Staycation: Day 1
Staycation: Day 2
4:42a: I wake up too early. I dream of the Mondrian-styled serving piece I’ll create today out of some quilted black walnut that I processed yesterday.
What? You don’t dream about vacations?
8:10a: enter the shop
9:09a: done with the first round of glue ups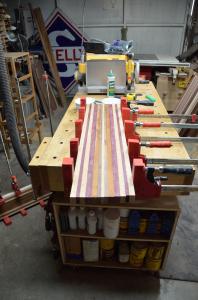
9:41a: Mondrian board phase one is done
10:30a: I realized the black walnut I have in rough stock would be great for a board I’m putting together … so I took all 10 pieces of the walnut I put in the rolling cart yesterday and took them out to be processed today. I’m losing my mind in this over-crowded shop.
10:54a: put together the first two boards of the day
11:37a: talked to Dennis, who’s installing the computer system for a broadcaster in Las Vegas, NM. He’s doing fine … but I dump my glue-infused water bowl while I’m talking to him. Clean up, workbench one.
12:12p: second glue up session done

New technique: I’m following the manufacturer’s recommendation on how to clean up squeeze out from glue ups. It’s a mess, but at least it’s not using paper towels.
12:55p: my gosh, this ash is pretty. Why didn’t anyone tell me to work with ash before? And … it’s time for lunch.
2:18p: back to the shop
3:56p: I begin to throw things. This may not end well.

While I’m throwing things, I’m also amusing myself by playing a game of Jenga, stacking up new board set ups on a garbage can. I have NO ROOM.
5:31p: Third glue up session done.
5:37p: Sweep the shop & turn out the lights.
Results, staycation day 2:
- 14 more cheese boards picked & processed
- 23 more cheese boards glued up
More
Staycation: Day 1
7:30a: She: “Are you OK with breakfast in 5 minutes?”
He: “You mean you’re cooking?” Note to self: this could be a good day.
8:01a: With her breakfast burrito success thoroughly evaluated (and found exceptional), I confronted the chaos that is my garage current shop. Too much stuff in too little space. 
8:25a: Stowed the Mrs M display pieces and Mr M inventory out of the way and began the real work of the day. I know the world has a lot of cheese. The world needs more cheese boards.

8:45a: I start to turn on my saw, but realize the time. Too soon.
9:05a: Dust collection up. Saw on. I have a bunch of new lumber to process, and its going to be a rough ride. The lumber is common grade with a lot of checking (which are cracks in the boards). Cherry, black walnut and ash are all mixed in the pile. Lots of odd sizes. The process begins in earnest. 10:22a: # 1 daughter-in-law and # 1 granddaughter arrive. I’m in my hearing protection with dust collection and table saw running, and Payton walks to the middle of the driveway and begins talking to me. I shut down and lose the ear muffs: I need to listen. Of course.
10:37a: First cheese board lumber picked and processed. Glue-ups could now begin … if there was a work surface available in the shop. There is not, nor will there be for a long time.
10:50a: Velda yells at me because she needs access to the garage refrigerator. To do that, she needs to cross into my garage woodshop. That woman has no boundaries.
11:000a: Little Girl arrives. She’s going to the Pumpkin Patch with Velda & Payton. And my camera.
12:43p: I lay out the 12th board of the day, which is dubbed the USC board, as it has purpleheart and yellowheart as the principal woods. It hurts me a little to make a board for the anti-Bruins … but it’s OK. I’ll just charge them more.
1:08p: The 16th board is also for USC fans. It’ll be end grain. And have a stiffer Trojan tax. I love it when prices go up.
1:23p: I discover that I’m much more out of control than I thought. After a few hours in the shop processing rough lumber, I glance at the dust collector, and see that not only is the lower bag full, it has now overflowed into the upper bag, which stands 50% full. This is a very, very bad thing.
See The Worst Job In The Shop. When I wrote that piece, the dust collector upper bag was perhaps 10% full. And that was bad.
This is worse.
I’m going to get really dirty … after lunch. Good plan. After lunch.
So, no dust collection until after lunch. I can still use the table saw and planer … but the dust will have to, uh, collect on its own.
1:45p: The ladies return with orange squash in hand. I am not offered my camera back.
1:53p: The 20th new cheese board is picked and processed, awaiting glue-up.
2:02p: Lunch. Thank goodness.
2:30p: I am invited to a Mrs M’s Handmade executive session to present the plan for this weekend’s big event: the Saugus High Boutique Fantastique. We have rented a double booth, 10’x20′, which is our biggest ever. We need a plan. We need more tables. We need more stuff.
3:03p: We review the plan, we review the calendar. We have a shopping list and tasks to complete.
3:12p: The ladies decide that Alley is the boss of me. In their complicated female logic, it’s found that Velda is not the boss of me (they got that one right), but Alley is. I do not comment on their conclusion. That is evidence of increased wisdom due to my experience in handling living with being around … sorry. I am mistaken. Alley is the boss of me, and I should just accept that without comment. Done.
3:24p: The ladies approve me to purchase a plunge router. I need that tool to make good juice grooves for cutting boards, and that is now in my future.
Because I need more stuff in my shop.
Oh, and prices will go up. I love it when prices go up.
3:29p: Back to the shop. And the worst job in the shop.
4:03p: Velda yells at me because I have lumber stacked in front of her freezer. No surprise there: I have lumber stacked everywhere at this point.
4:17p: I discover a rats nest buried behind the lumber behind the dust collector. And a dead rat. The. Worst. Job. In. The. Shop.
4:48p: Finish cleaning up the dust collector. One big bag of sawdust and five medium bags of sawdust are removed from the shop. Oh, and the dead thing, too.
5:03p: Reassemble the dust collector. Thank goodness.
5:22p: Empty the rolling cut-off bin where I put, uh, cut-offs. This stock is 2′ to 5′ long. I remove the softwoods that I no longer have room to store here, and organize the hardwood. I find some great hard maple and a piece of teak that’ll be used tomorrow. I fill the bin with the common stock walnut and the new cut-offs from today. The cut-offs from the last 3 months will continue to be wherever I can stick them.
5:45p: Little Girl and Miss P go to the hockey game to watch E play. Side note: when Auntie Lauren was watching the Kings game this afternoon, Payton asked which of the players was E. Adorable.
5:50p: Christopher arrives. He begins to search for a tool I don’t use. Hahahahahahaha. He doesn’t find it.
6:15p: First glue-up complete.
6:40p: Shop shut down. Time for a shower.
Results, staycation day 1:
- 20 cheese boards picked & processed
- 5 cheese boards glued up
Mrs Ms Handmade set a one-day sales record yesterday. My retail persona, Mr M, sold more wooden objects in a day than ever before … 13 pieces were sold.
Yes, for you numerologists out there, that good number occurs again in our lives. I love 13. Link below.
So, back to the success thing.
I’ve been building a number of cutting boards, cheese boards and serving pieces, as you know. Have to be ready for the big push for the holidays! And in our first big event of the 4th quarter … we sold 1/6 of the inventory.
One sixth.
Here’s the problem: we have 14 days of sales left. Oh, and we added another retail location last week, and that will require pieces to sell. And display pieces. In three weeks.
So, as much as I enjoyed having that nice lady pick apart Mrs. M’s lotion display so she could buy the display pieces for Christmas presents … and then hand me more money when she saw another piece when she began to walk away … it meant that more pieces were walking away.
 Success means I have a LOT LOT LOT of work to do in order to be ready for November’s events.
Success. And since when does success mean you have to work harder?
Perhaps I would be happier as a lazy bum.
Nah. Never going to happen.
So here’s a visual goodbye to some of the pieces I loved that served to remind me that there’s a lot of work required of me … and I couldn’t be happier.

Hickory end grain board. 14″ diameter x 1-1/4″ thick. 20 degree cant on the edge.

# 62 Cutting Board, $150. Hard Maple, Walnut, Yellowheart and Cherry. 22-1/8″ x 14-3/8″ x 1-5/8″. Edge grain.

# 70 Cutting Board, $125. Hard Maple end grain cutting board. 12″ x 14″ x 1-1/2″.

Three pieces were made from some walnut I got from a contractor doing home restorations. There are 3 slightly different sizes. # 1 is 11-3/8″ x 10-3/4″ x 1-1/8″. # 2 is 10-5/8″ x 10-1/2″ x 1-1/8″. # 3 is 10-7/8″ x 9-1/4″ x 1-1/8″. End Grain. Black Walnut.

# 10 Cheese Board, $30. Walnut, Padauk, Hard Maple, Red Oak.

#27: Purpleheart, Walnut, Red Oak, Hard Maple.
More
June 13, 1975
13 Things To Do On Friday The 13th
My latest cycle of woodworking passion resulted in 13 cutting boards and cheese boards … and some that are whatever you think they are.
Small cutting boards are perfect for slicing a tomato or an onion … or for serving cheese & crackers. Therefore, I’m not going to define them. That will be up to their owners!
With that disclaimer, here are the new boards.

# 12 Cheese Board, $35. Black Walnut edge grain with Yellowheart and Hard Maple inlays.

Hard Maple end grain cutting board. 16″ x 20″ x 1-1/2″. Commissioned piece.

Hickory end grain board. 14″ diameter x 1-1/4″ thick. 20 degree cant on the edge.

# 31 Cutting Board, $40. Hard Maple and Black Walnut end grain board. 11-3/4″ x 8″ x 1″.

# 29 Cutting Board, $40. Hard Maple and Black Walnut end grain board. 7″ x 10-1/2″ x 1″.

# 30 Cutting Board, $40. Hard Maple and Black Walnut End Grain Board. 12-7/8″ x 8-3/8″ x 1″.

# 70 Cutting Board, $125. Hard Maple end grain cutting board. 12″ x 14″ x 1-1/2″.
The design for this Cheese & Cracker Serving Tray published in Woodsmith issue # 214. Great design, I thought … but that’s a story for another day.
I made 6 of these servers. All have cherry frames, with the cutting board insert being either end grain hard maple, end grain walnut, or edge grain walnut. All will be for sale this weekend at the SCV Junction, which is the first fall event for Mrs Ms Handmade. See you there!
Here is the progression through 11 days in the shop.

First step: figure out the right angle for a table saw cove cut to get the right cove cut width.

With the temporary fence set up on the saw at the right angle …

… cutting the cove cut begins.

Multiple passes required to make the proper cove cut.

I’m making 6x of these servers in one cycle.

Sanding a cove cut requires a few tools.

This flap sander is great for sanding round cuts like this cove cut.

The two ends of the servers can now be cut apart.

Mark the positions of the end piece coves onto the side pieces so the holes drilled for the dowels will not intersect.

Each side piece gets drilled through in 4 places.

The end pieces are cut to a 30 degree angle on each side.

The side pieces are then cut to a matching 30 degree angle to fit against the end pieces.

The glue up of the server has to be done with pressure from 4 directions at once.

The side pieces were drilled for the dowels on the drill press; it’s now time to extend those holes into the end pieces.

The dowel holes are deep (up to the masking tape marker) so the cross-grain, glued-in dowel will add strength to the end/side glue joint.

Time to smooth the cutting board insert glue ups.

The ends of the sides and ends have to be cut away to reveal the handles.

A tall auxilary fence on the table saw makes this vertical cut a snap.

The outside of the frame is also cut to 30 degrees.

Round the handles on the bandsaw.

Shape the cutting board inserts to fit.

Sanding begins.

Nothing beats a sharp chisel for cleaning up hardened glue in a complex shape.

The hold down on the bench (the black thing holding down the edge of the server) is the best tool to hold the piece in place while the underside curves of the handle get cleaned up.

Sanding is never a snap. Dust collection helps, but I’m still covered in dust after sanding with seven different machines, working up through 5 different grits.

Mineral oil is always the finish of choice for a serving piece.
 This weekend is Mrs M’s Handmade’s first event in a couple of months. The ladies have been working to develop some new formulations and new products … and I’ve been busy in the
garage workshop, too.
One of today’s assignments: make business card holders for our new, uh, business cards.
Which brings us to today’s conversation.
He: I think the business card holders turned out well.
She: I really like them. I think you can sell them. How many did you make?
He: I made three. (editor’s note: there are 2 Mrs M’s and one Mr M, so there are three of us. Three.)
She: Three? You should have made more. I wanted one for my office.
He: You should have said something. I only made three.
She: You can make more. I want one for my office.
Sometimes, Labor Day is the gift that keeps giving.
MrsMowry asked me to build a couple of bookcases for her new classroom (!). I was happy to oblige. It did make me wonder, though … how much longer will bookcases be something woodworkers build?
A pair of bookcases was my very first DIY project, back before “DIY” had entered the lexicon. Velda and I had set up our first apartment in Newhall, CA, while I went to grad school … and we were awash in albums (remember those?) and books. It was 1978.
I bought some pine and a sheet of 1/4″ ply – plus a Skil Saw and a carpenter’s square – and built 2 bookcases. Shelves were held in place with 1″ x 2″ cleats and 6 penny nails. Simple, clunky but effective. One bookcase was 3′ x 4′; the other was 4′ x 5′. Even then, I knew how to design a project to use all of a 4’x8′ sheet of ply.
The bookshelves moved with us to our first house, but didn’t make it to our second house. We demanded better … and bought them. I wasn’t really a woodworker back then.
My skill set – and my tools – have improved since that first set of bookcases. For MrsMowry’s commission, I used dadoes for the shelf joints, with the plywood screwed & glued into place. The edges got 1/2″ red oak trim, which was glued and then secured in place with my nail gun. My, how the times have changed.
Prior to this project, I had only made one bookcase since 1978. That got me to thinking. Will I ever build another one?
Woodworking projects, you see, reflect the times that the project lives in. Woodworkers used to make pie safes. CD Racks. Bread boxes. Today, not so much.
English teachers in junior high classrooms still need bookcases, apparently. But I wonder … for how much longer?

Painting by Little Girl & MrsMowry. I got to avoid the painting!

No, that’s not a spelling error on the bulletin board. MrsMowry has a Harry Potter theme going on.


