I didn’t sell out of Cheese Slicers at my last event … but I only had one left at the end.
Honestly, at that point, it’s almost as if they were sold out. Only one means no selection was available: it was strictly take it or leave it. Variety is a primary driver of the Woodshop, from every perspective.
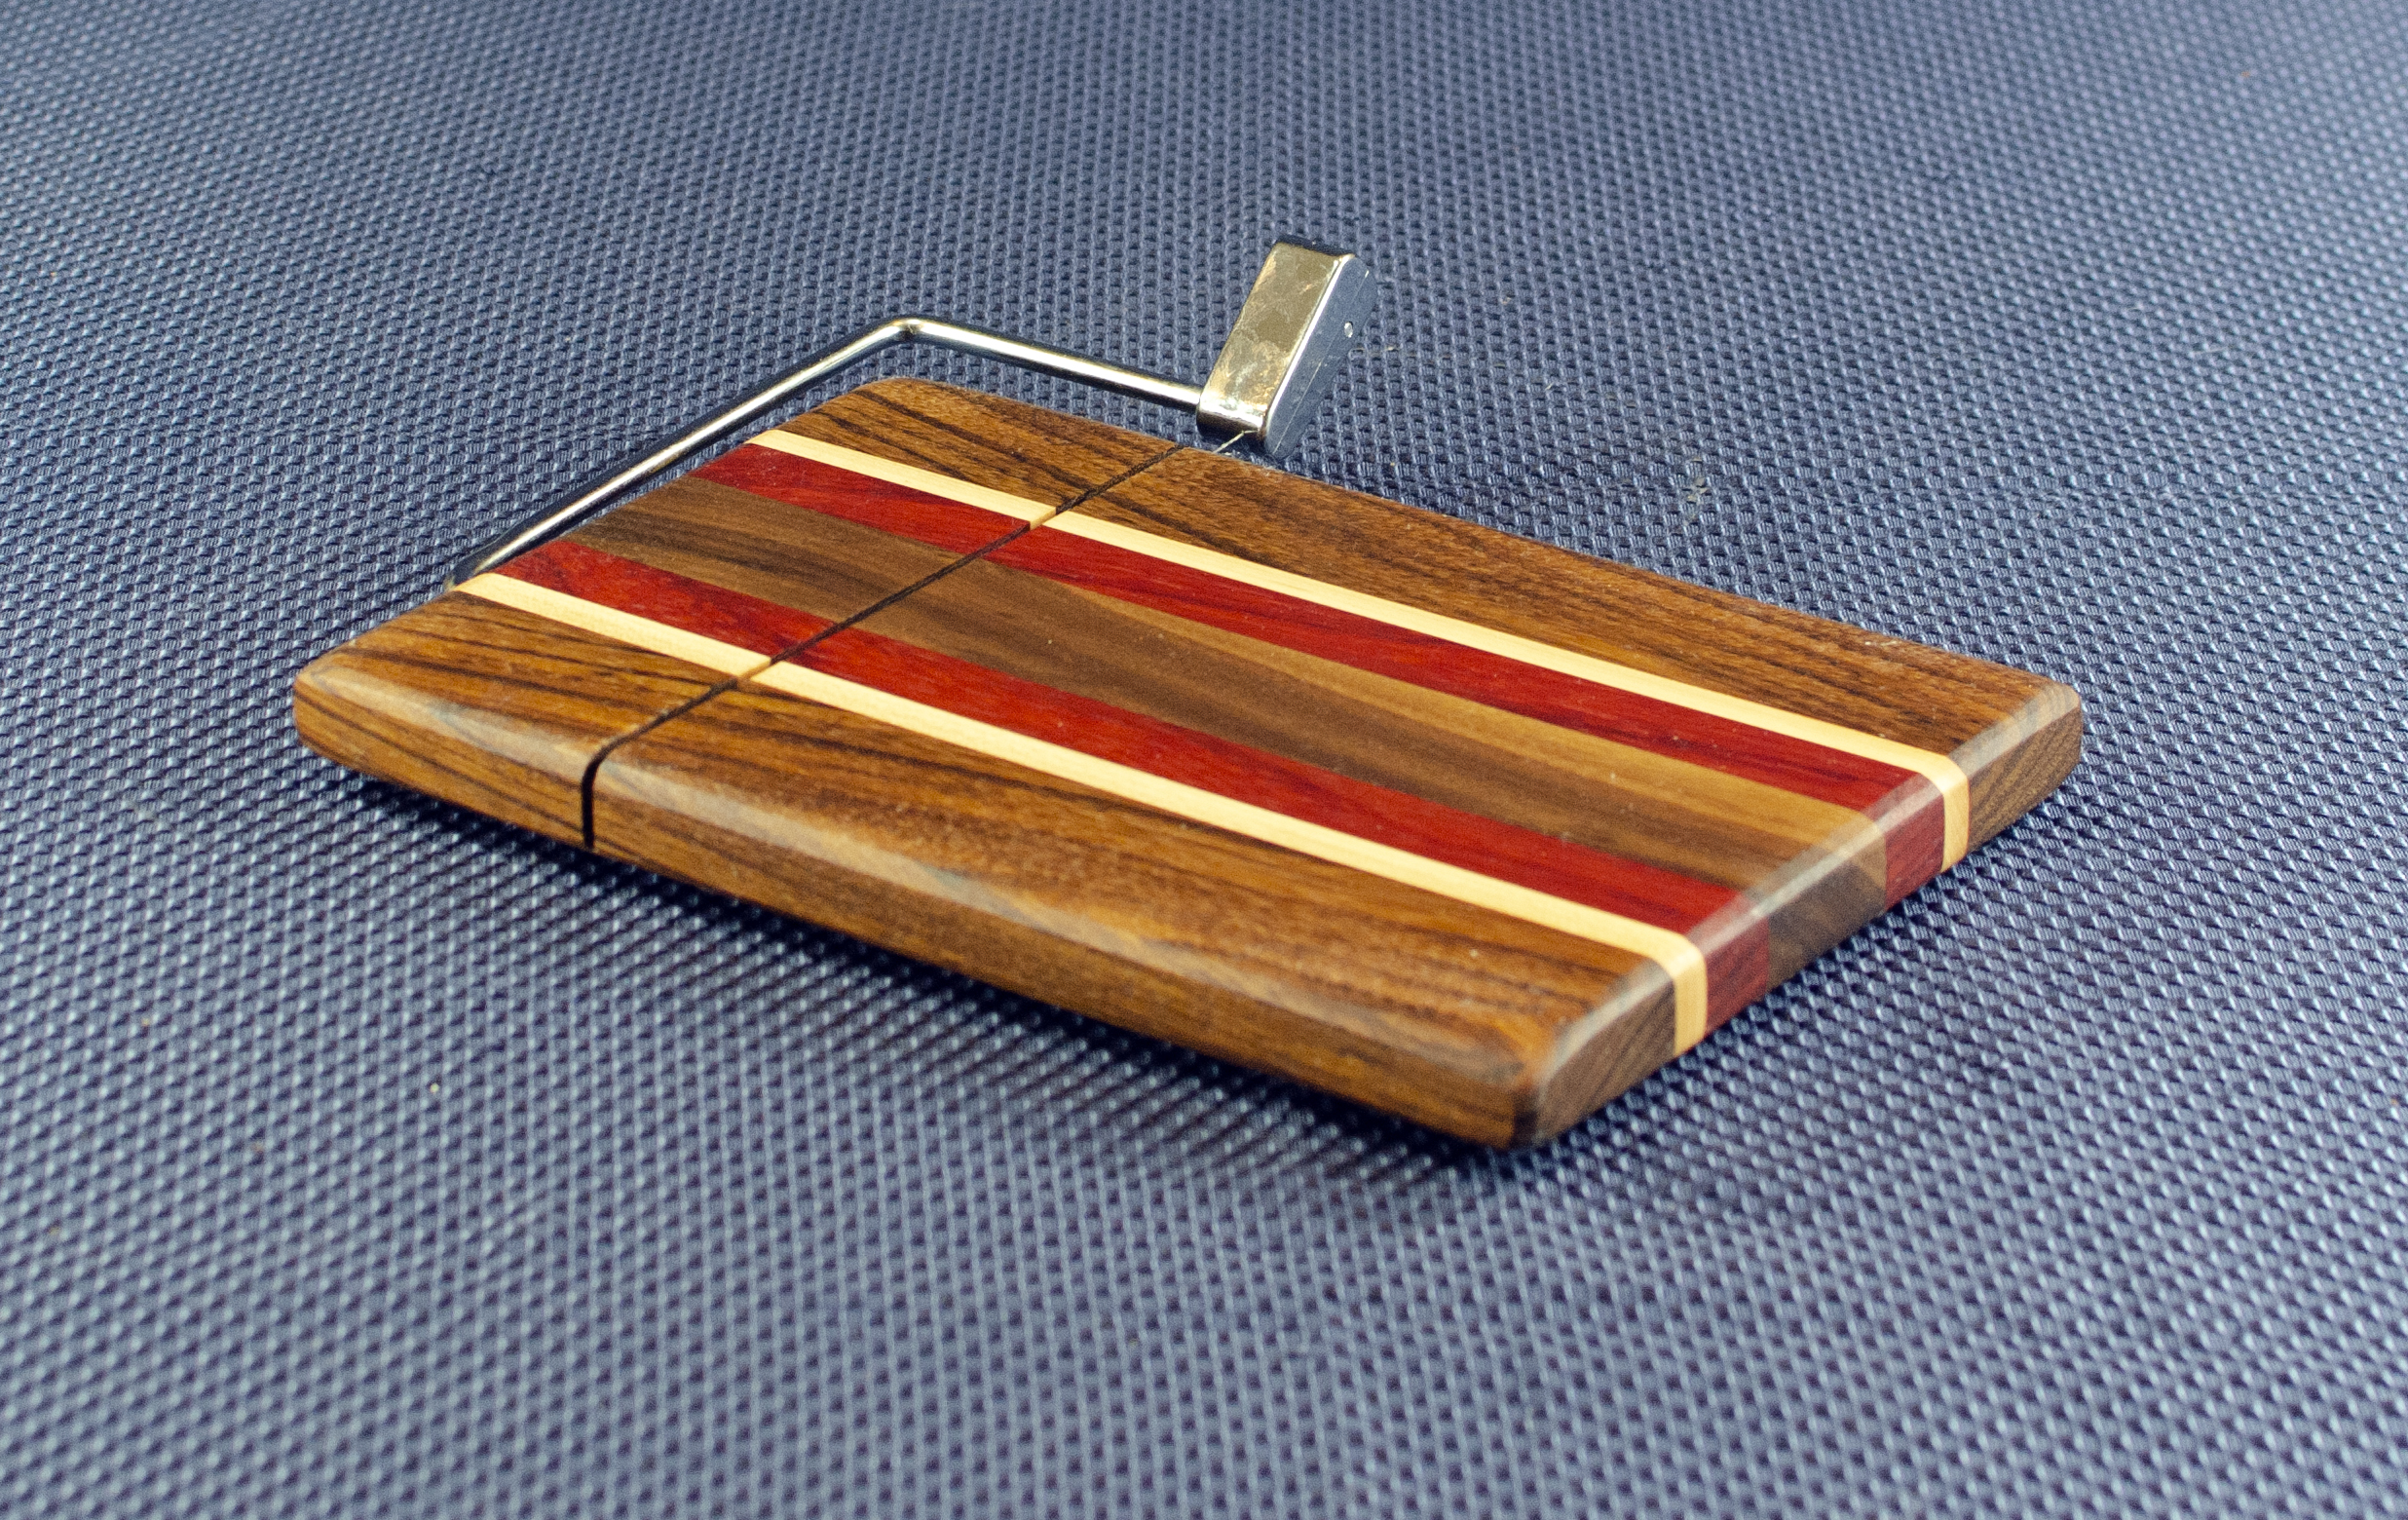
Variety it is. Not only do I have a wide array of new wood designs, I once again have 2 colors of slicers: chrome & black. It only seems right!
It’s a common morning greeting among vendors … “we’re going to sell out today!”
I never think that. I know that if I sell out … I’ll have nothing for my next event. I don’t want to sell out, I think to myself.
Which is not right, of course.
However, at my last event, I certainly did sell out of Cracker Things … and that was bad. I could have sold several more: I actually had customers coming to the booth and asking for them by name.
I did bad. Very bad. I sold out of Cracker Things.
So, nothing to do but get to it. Dr H visited a couple of weeks ago, and he helped me make a bunch of bases for a new batch of Cracker Things … I actually had 95 bases in process! Only a fraction of that number made it to the finish line, though.
That’s OK. I’m no longer out of the item that customers ask for by name!
For those of you that have no idea what I’m talking about, that’s OK … here is a Cracker Thing, properly appointed with a wide array of crackers:
Each Cracker Thing is about 10-1/2″ long, and will hold quite a number of crackers, as you see. The sides are 2″ wide, so your typical Milton’s cracker (one of my favorites) fits very well, indeed. Most of the Cracker Things have a chaos base. The pieces that hold the crackers are often mismatched woods.
You know I’m in search of the perfect serving piece for Cheese & Crackers … and I’ve got several variations in the booth at every event. All good.
The corollary to making cheese boards, of course, is what to do with the crackers. For most people, that’s either a pile of crackers on the board, or a small bowl or two.
That’s never really satisfied me. I’ve always thought there had to be a better way … and I’ve got one I’m excited about.
I’ve gotten some comments about the name, but I’m sticking with it.
The base of the Cracker Things is a multi-colored selection of exotic woods. Most have an assymetrical, “chaos” design. Others are symetrical, but are always very colorful. The cracker holders, currently, are made from Hard Maple, Cherry, Black Walnut and Sapele.
Each Cracker Thing is 11″ long, which happens to be the length of the cheese boards that I make. They are 4″ wide and 2-1/2″ high … not including the crackers.
I was very happy when lady after lady entered the booth this weekend, and the universal comment was, “Those are cute!”
They are great gifts; I’m introducing them at $35 each. After one event … I know I have to make more.
My problem is I love a simple meal of cheese & crackers … and I want to make the perfect serving piece to complement that repast.
We have tried and used a variety of serving pieces, like this one:
And this one:
Cherry server, Black Walnut end grain cutting board insert.
And, of course, this one:
And those are great (well, maybe not the middle one so much). Today’s offering, however, takes a slightly different approach.
Pieces are 10″ x 14″ x 1″. Most are made for 2-sided use, with a routed circle on one side for the glass dome to sit in, and the other side left flat for other uses. I made a few of them with my traditional non-skid rubber feet held on with stainless steel screws in case you want feet instead of 2-sided use. OK, choose!
Domed Cheese & Cracker Server 16 – 01. Hard Maple, Bubinga & Bloodwood. Footed.
Domed Cheese & Cracker Server 16 – 02. Hard Maple, Yellowheart & Jatoba. Footed.
Domed Cheese & Cracker Server 16 – 03. Hard Maple, Jatoba & Cherry. Footed.
I introduced my seldom-called Elegant Cheese & Cracker Servers just over 2 years ago, and they continue to be a big hit.
But when people see them, they called them surfboards.
As you probably know, I eventually started making boards shaped like actual surfboards, but that hasn’t stopped anyone from calling these serving pieces surfboards. Bowing to the inevitable pressure of the marketplace, I now informally call these pieces large surfboards.
The big batch I made of these last November are now gone, so, it’s time to go back to the shop. I do these boards in very large batches, as they require special and unique setups. To make the sweeping “cove cuts” underneath the lips of the board, for example, I’m making oblique cuts over an unprotected saw blade moving at over 100 MPH (yes, I’ve done the math), and Mrs M won’t let me do that very often.
She just hasn’t trusted me much since that trip to the ER back in ‘aught six….
Links below show you how the production process works on these unique pieces, and also show you the dangers of being near a table saw blade operating without a blade guard.
If you would like to order a special surfboard Elegant Cheese & Cracker Server, then now’s the time. Lumber hasn’t been ordered yet, but I anticipate local delivery in November. I’ll have loads of time to deliver these to you & yours before Christmas. Want some? Please let me know.
Elegant Cheese & Cracker Servers are 12″ x 19″ x 1-1/4″. Prices are $75 – $100, depending on wood selection. Shipping is $15 within the US, or you can pick up at the Woodshop for free! Engraving is also available for personalized boards.
So that you can see what all of the fuss is about, here are some of my favorites from previous makings. I really can’t choose a favorite, but the struggles I had making 15-26 out of warped, twisted, cupped 4/4 Bloodwood through six glue-ups will never be forgotten:
Large Surfboard # 15 – 20. Cherry.
Surfboard # 15 – 43. Black Walnut, Purpleheart & Curly Cherry. 12″ x 19″ x 1-1/4″.
Surfboard # 15 – 07. Hard Maple and Jarrah.
Surfboard # 15 – 40. Black Walnut, Jatoba, Cherry & Hard Maple. 12″ x 19″ x 1-1/4″.
Surfboard # 15 – 36. Hard Maple, Padauk & Black Walnut. 12″ x 19″ x 1-1/4″. Sold in its first showing.
Surfboard # 15 – 34. Black Walnut & Yellowheart. 12″ x 19″ x 1-1/4″.
Surfboard # 15 – 30. Black Walnut. 12″ x 19″ x 1-1/4″.
Surfboard 15 – 31. Black Walnut, Cherry, Hard Maple & Goncalo Alves. 12″ x 19″ x 1-1/4″.
Surfboard # 15 – 41. Black Walnut & Cherry. 12″ x 19″ x 1-1/4″.
Surfboard # 15 – 19. Black Walnut & Red Oak.
Large Surfboard # 15 – 26. Bloodwood.
Surfboard # 15 – 05. Cherry, Black Walnut and Hard Maple.
The design for this Cheese & Cracker Serving Tray published in Woodsmith issue # 214. Great design, I thought … but that’s a story for another day.
I made 6 of these servers. All have cherry frames, with the cutting board insert being either end grain hard maple, end grain walnut, or edge grain walnut. All will be for sale this weekend at the SCV Junction, which is the first fall event for Mrs Ms Handmade. See you there!
Here is the progression through 11 days in the shop.
First step: figure out the right angle for a table saw cove cut to get the right cove cut width.
With the temporary fence set up on the saw at the right angle …
… cutting the cove cut begins.
Multiple passes required to make the proper cove cut.
I’m making 6x of these servers in one cycle.
Sanding a cove cut requires a few tools.
This flap sander is great for sanding round cuts like this cove cut.
The two ends of the servers can now be cut apart.
Mark the positions of the end piece coves onto the side pieces so the holes drilled for the dowels will not intersect.
Each side piece gets drilled through in 4 places.
The end pieces are cut to a 30 degree angle on each side.
The side pieces are then cut to a matching 30 degree angle to fit against the end pieces.
The glue up of the server has to be done with pressure from 4 directions at once.
The side pieces were drilled for the dowels on the drill press; it’s now time to extend those holes into the end pieces.
The dowel holes are deep (up to the masking tape marker) so the cross-grain, glued-in dowel will add strength to the end/side glue joint.
Time to smooth the cutting board insert glue ups.
The ends of the sides and ends have to be cut away to reveal the handles.
A tall auxilary fence on the table saw makes this vertical cut a snap.
The outside of the frame is also cut to 30 degrees.
Round the handles on the bandsaw.
Shape the cutting board inserts to fit.
Sanding begins.
Nothing beats a sharp chisel for cleaning up hardened glue in a complex shape.
The hold down on the bench (the black thing holding down the edge of the server) is the best tool to hold the piece in place while the underside curves of the handle get cleaned up.
Sanding is never a snap. Dust collection helps, but I’m still covered in dust after sanding with seven different machines, working up through 5 different grits.
Mineral oil is always the finish of choice for a serving piece.