Archive for the ‘Woodworking’ Tag
There are 2 kinds of woodworkers. I’m the kind that cuts wood with spinning sharp objects like saw blades … and my brother-in-law Steve is the other kind.
He thinks it’s a good idea to spin wood at a very high rate of speed … and hold a sharp object against that wood to make it conform to his desires.
He’s crazy.
So, a perfect collaboration was born. I do my thing, and he does his thing. The pictures below are what resulted.
The spindles (from Steve) are made from walnut; the routed platters (from me) for the 3-tier are red oak. The 4 Sauce routed servers are hard maple (from me), with walnut handles (from Steve).

I did the routed platters … Steve did the turned spindles.

I’m really not happy with my wood selection for these platters … the wood is not well-matched; it’s got lots of odd coloring. I was choosing wood from the back of the cut-off section, I know. I made it work … and the result is not pretty. IMHO.

This 4 Sauce server is good as is, or can hold 4″ ramekins in each section. Either way, it’s good for sauce or pizza prep.

This is a 2nd 4 Sauce server, with a smaller handle.
More
Turn, Turn, Turn
Done- Round 3: The Bowl Adventure
Round Three: The Bowl Adventure
A Day Of Finishing
Round Two: The Bowl Adventure
Football Snack Bowl
Making A Snowman
Dear Do-It-Yourself Store,
I shop at your store.
I do stuff at home. Building. Lighting. Home repair.
I shop at your store.
I just bought some 2x4s for a local junior high drama production. I was making a bed for a princess.
I shop at your store.
Here’s my question: what Spawn of Satan employee decided it was a good idea to put 12 staples in a 2×4? What, you need my blood on your floor to seal our deal from across the river Styx?
In the future, control the hordes of devils that pretend to represent your interests while seeking to wound your loyal customers.
Get behind me, Satan.
Oh, and good news. I overcame your metallic trap. The bed is almost ready for the princess. Temporary modeling by MrsMowry.

All boards must be inspected on all 6 sides (think about it) before they can go into the lumber pile.

2-6′ sides, 4-4′ stretchers, and 6-30″ legs.

The braces for the legs have to be cut on a 45* angle. Don’t tell Velda that I cut these with the blade guard out of the way.

Here’s why: cutting these triangular pieces didn’t work with the blade guard in place. So, yes, I was very careful.

See? All 10 pieces cut. No blood shed in my shop … after avoiding the staples put in the lumber by the Spawns Of Satan, I wasn’t going to have a problem in the workshop.

The bed is now ready for the set decorator. Modeling by the Musical Director, MrsMowry.
 I’ve heard it for years.
I was working in the garage workshop last weekend, and a neighbor wanted to hire me to redo her kitchen.
I’ve ignored it. Always.
Until now.
Given that Mrs M’s Handmade is about to be an actual business, it seemed that I needed to help out. In a week or three, the website will be up. In a month, we’ll be at the Santa Clarita Street Fair.
So, it was time to get ready.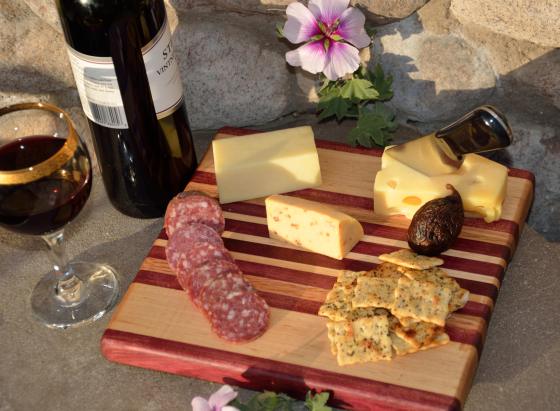
22 Cheese Boards are now ready for sale. All of the boards are approximately 8″ x 10″. All are unique. The most prevalent wood is hard maple, but I’ve also used purpleheart, yellowheart, red oak, cherry, walnut, mahogany, teak, padauk, jatoba and honey locust. They are all finished with mineral oil, and then a beeswax/mineral oil topcoat.

# 11 Cheese Board, $35. Jatoba, Hard Maple, Walnut.

# 10 Cheese Board, $30. Walnut, Padauk, Hard Maple, Red Oak.

# 18 Cheese Board, $40. Edge grain. Purpleheart, Hard Maple and (this one has) Red Oak. I’m no longer using Red Oak in this design.

# 8 Cheese Board, $30. Red Oak, Walnut, Yellowheart.

# 9 Cheese Board, $35. Red Oak, Purpleheart, Walnut, Hard Maple.

# 7 Cheese Board, $30. Hard Maple, Padauk, Walnut.

In round 3, I created a few patterns for personalized bowls … in this case, Velda drew the pattern for her “perfect sourdough loaf” bread bowl.

After hogging out the waste on the drill press, the routing begins.

Here the routing is about half done; I’m through the top layer of Red Oak and just beginning to route the Walnut.

I made two versions. The bottom one was from a single White Oak board, and the other was made from two pieces of 4/4 Red Oak sandwiching a piece of 1/2″ thick Walnut.

This blank is two glue-ups of 4/4 Black Walnut sandwiched around a glue-up of a wonderful old piece of 8/4 Black Walnut.

The perfect snack companion for a football game!

One of my favorite pieces, made from Yellowheart, Teak and Walnut. I was able to piece this together out of scrap, and the results were very unique.

Here’s the same pattern made from two very different wood combinations. On the left, 4/4 Purpleheart and 8/4 Red Oak gives a very different result from the yellowheart/walnut/teak version.

This large square server was fun to make from Hard Maple and Purpleheart. The problem is always that Purpleheart burns SO EASILY when you are sanding or routing. These pieces were still wet (they hadn’t dried out in the workshop for a few months before I machined them), so I believe that made the problem worse.

I made two of these small, shallow bowls. Woods are Koa (in the middle), Cherry (next to the Koa) and Tigerwood. Rather spectacular, and the Koa changes colors as you rotate it in the light.

This simple bowl is made from Honey Locust (on top), Walnut and Cherry. The color variation in the Honey Locust is due to sapwood in the piece that I used … that’s a feature, not a defect!

Same blanks were used for all three: 8/4 Hard Maple with 4/4 Purpleheart. The one on top shows more of the passionate color when filled with candy. Your preference?

I found some wonderful Padauk on sale at the Pasadena Rockler store for just $5.99/board foot. This large bowl is a sandwich of two glue-ups of 4/4 Padauk surrounding a third White Oak glue-up, planed to 1/2″ thick. This bowl used 3 board feet of Padauk and 1-1/2 board feet of White Oak (most of which became sawdust, unfortunately!).

The color is not re-touched. It’s really that orange.

Walnut oil was used to finish all of these bowls. And, oh my, does the color pop on this one!

Padauk is photo-reactive. Over time, UV light will change the bright orange to a warm brown. Better keep it in the dark until Hallowe’en!

This multi-wood blank is destined to be a pretty bowl. After I glued up Jatoba, Cherry, Walnut and Tigerwood, I ran it through the planer to get what will become the bottom of the bowl absolutely flat on both sides.

With the bottom of the bowl flat, I can attach it to a second glue-up of Honey Locust, that will be the rim of the bowl. I used cauls across the top of the bowl to ensure the Honey Locust was glued to the bottom blank at all points.

Colorful shavings when you drill out the not-a-bowl.

You begin to see the ultimate look of the bowl as it is routed out.

All of the bowls got their bottom edge rounded on the router table.

Some got a smooth bottom edge, but this bowl got a relieved bottom, making the bowl appear to float above the table.

The wonderful grain pattern on the outside of the bowl is a piece of Jatoba.

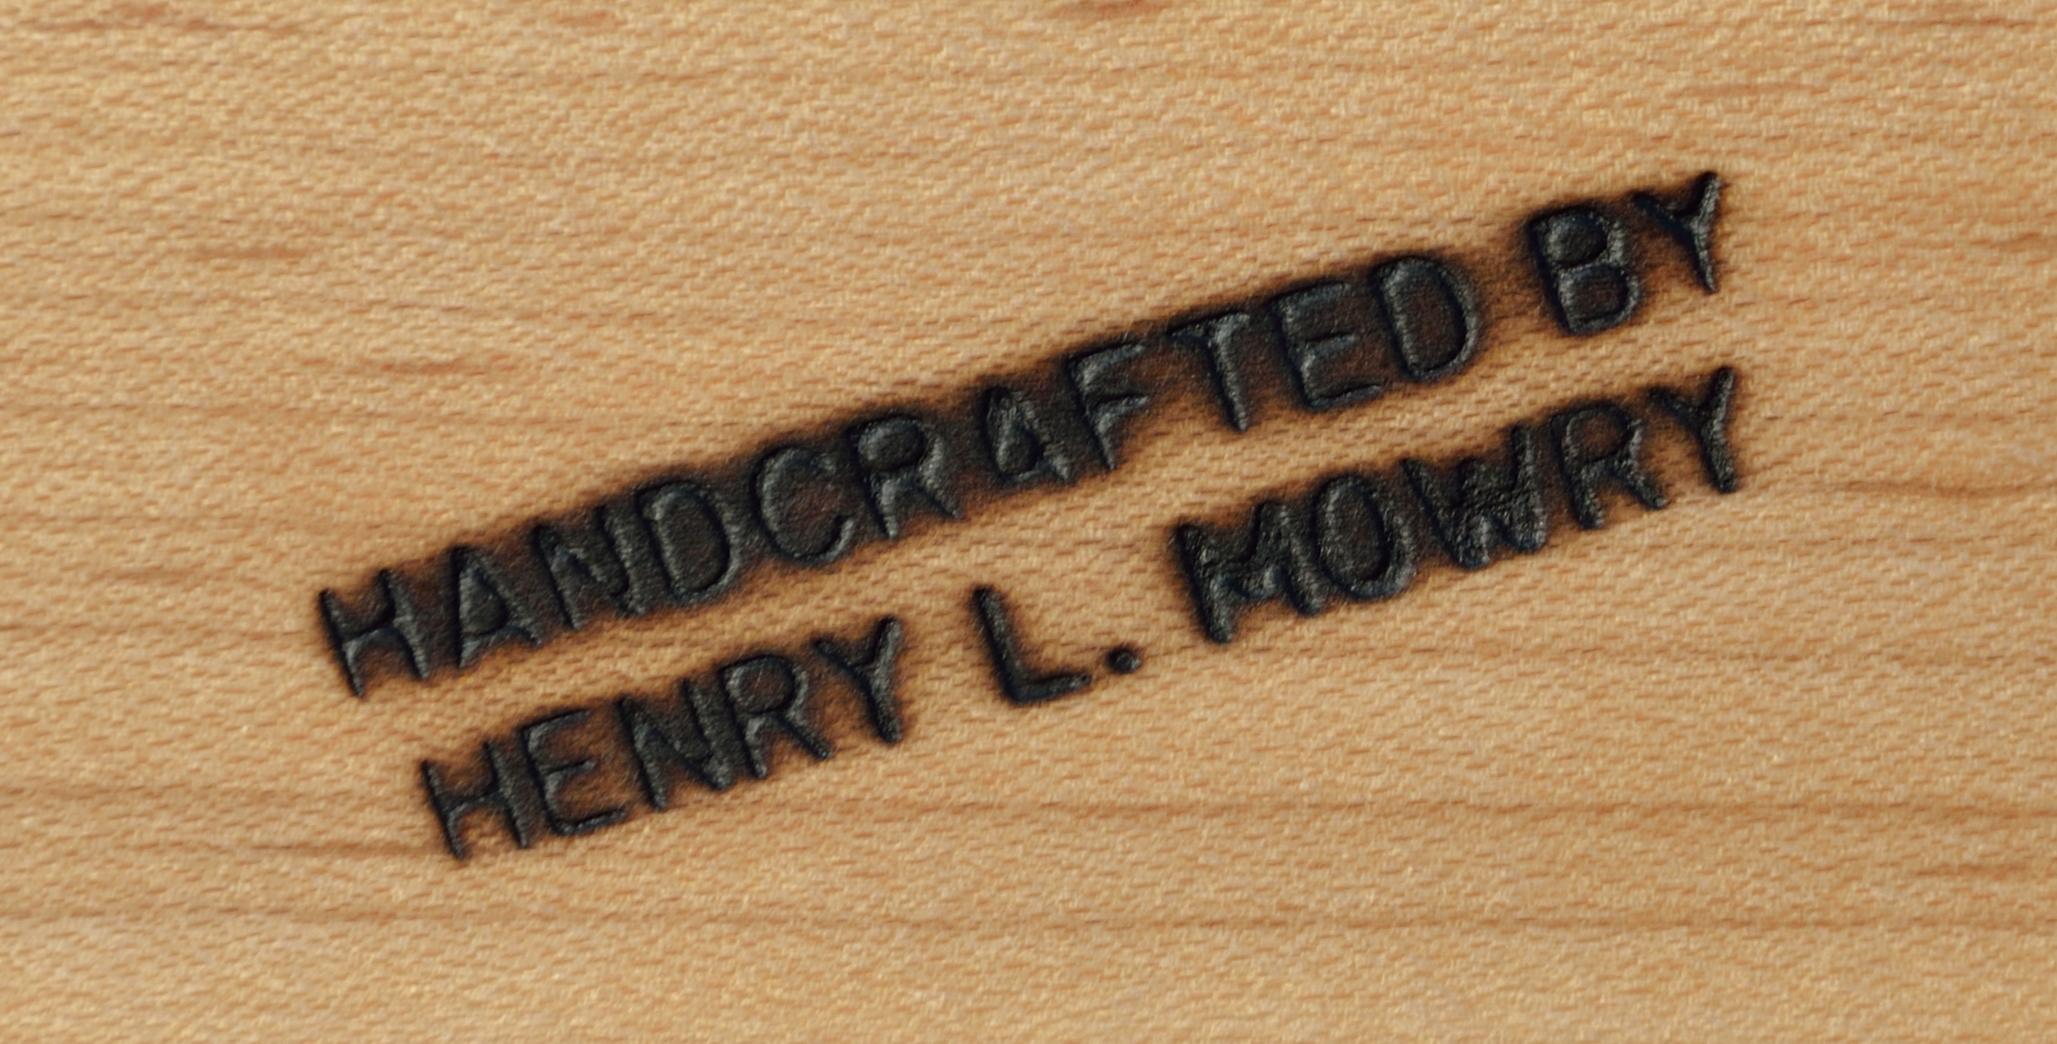
This brand goes on every piece … but Velda has claimed this one!

This bowl has different sections routed to different depths. The blank is two pieces of 4/4 Hard Maple sandwiched around Purpleheart, that I planed down to just 1/4″ in thickness.

All of those scallops were a challenge to get clean and pretty, I assure you!

Now that’s a bowl ready for Christmas!
More
Round Three: The Bowl Adventure
A Day Of Finishing
I Was Working Too Hard….
Round Two: The Bowl Adventure
Football Snack Bowl
Making A Snowman
For Christmas, I made Velda a large, long grain cutting board made of both domestic and exotic hardwoods. Here’s what I used:
Honey Locust – because as nice as she is … she definitely has thorns
Cherry – because she can be sweet
Jatoba – because sometimes I have no idea what she means
Walnut – because she’s definitely nutty
Tigerwood – because I’ve seen her angry
The cutting board measures 1′-9″ long x 1′-3-7/8″ wide x 1-1/4″ thick. That’s a very large cutting board … but that’s what she wanted. To finish, I gave it an initial coat of mineral oil, wiped it off when it was dry, and then added a Velda-made mineral oil and beeswax combination: 25% beeswax by volume. It has rubber feet so it won’t slide around; I expect it to get some use in her kitchen!
The companion small boards are made of the same woods, and are intended as cheese servers. They each measure 9-1/2″ long x 9-1/2″ wide x 7/8″ thick.

I bought Tigerwood for this project; caught it on sale and ended up using these pieces in 7 of the projects I made.

First step: lay out the boards in a pattern that is pleasing to the eye.

To make sure the boards stayed in order, I used 3 techniques. Each board was numbered in order, 1 – 17. I drew a chevron across the face of the board so you could tell at a glance if they were in order. Finally, I used blue painters tape to hold each half of the board together until I was ready to start glue-ups … I was taking 25 projects through the production process at the same time!

I assembled the board in two halves … it’s easier to only glue up that many at one time, and half of the project would fit into my planer; the whole project would not.

Break the tape, lay the boards out, and then rotate all but the last board 90 degrees to expose the glue face.

Cover every bit of the exposed boards with glue. No dry joints allowed!

Carefully begin clamping the boards together.

I wasn’t overly concerned with keeping the top surface flat, as this glue-up would go through the planer to flatten it out.

There are many techniques to remove squeeze out (excess glue) … I use wet paper towels to wipe most of the glue off.

Both sides have to be cleaned!

Let set 24 hours.

Plane the left and right halves at the same time to ensure they are exactly the same thickness … and then glue up the two halves, making sure the project is flat and smooth.

Finish was two coats of mineral oil.

After the second coat of mineral oil, I did a topcoat of a mineral oil/beeswax mixture to help give the board more protection from water.

Cutting board, 2 cheese boards.
This multi-wood blank is destined to be a pretty bowl. After I glued up Jatoba, Cherry, Walnut and Tigerwood, I ran it through the planer to get what will become the bottom of the bowl absolutely flat on both sides.
More
I Was Working Too Hard….
Round Two: The Bowl Adventure
Football Snack Bowl
Making A Snowman
And when this woodworker is finishing, that means branding, sanding, cleaning & oiling.

Not the right way to brand a board.

For flat surfaces, I use a random orbital sander … 60, 120, 180 and 240 grit. Each piece has to be brushed clean prior to finishing.

I used 5 different sanding machines for these projects. Hand sanding is a bonus!

It’s a rare day … a finishing day! … when my work bench and the table saw top are completely bare.

Projects awaiting the last step.

Laid out on scrap lumber so the oil on the bottom of the project can soak in, rather than being wrapped in plastic.

I wear my lucky finishing shirt … it’s got paint and stain from a number of projects. The bowls were each coated in walnut oil.

Finished pix coming soon to a blog near you!
I was in the garage workshop, and it was work. Sweat was involved. Work.
But then, when you’re cutting 10′ hard maple planks that weigh about 50 pounds, you, uh, work.

Here’s the table saw ready to do a crosscut on a hard maple plank.
I was ripping 2″ thick hard maple and black walnut, which means I was cutting the boards lengthwise. For this operation, my table saw is underpowered … I’ve got a good home-use saw, but this is a demanding cut into very hard lumber.
And I had been making them for a while.
The secret to making good cuts is going slow and steady. Too slow, and the blade may burn the wood. Too fast, and you stress the saw motor until it stops. That could be bad. Very bad.
I was going slow and steady, but the blade still stopped. I quickly turned off the saw so I could carefully back the board away from the blade. I assumed the knot in the end of the board was pinching the blade (when a board has uneven grain, such as around a knot, it can squeeze the blade and stress the motor). So, I flipped the board end for end and began the rip again.
This time, the blade quickly seized AND the saw tripped the breaker on the power circuit. Big trouble.
And that’s when it hit me. I was working too hard. Why wasn’t the saw doing the work? Could it be the blade was dull?
I pulled the sharpened blade I had waiting on the shelf. I use the Forrest Woodworker II 3/32″ Thin Kerf blade.
TMI?
I’ve got 2 blades that I rotate. When one gets dull, it goes out to be sharpened. When I get it back, it sits on the shelf until the cycle repeats. The blade on the shelf had been mailed back to me January 2012. That tells me 2 things:
- I’m not doing enough woodworking.
- The blade in the saw should be dull after 2 years … especially as I enter round 3 of the routed bowl affair.
So back to the question. Why was I working so hard?
I installed the newly sharpened blade, and tried to cut the 2″ thick hard maple again. How did it cut?
Like butter.
I need to remember to not work so hard.

Here is the largest variety of hardwood I’ve ever had in the shop. From left, there is black walnut, hard maple, canarywood, mahogany, padauk (the orange one), purpleheart (you figure it out), African teak, cherry and poplar. But I’m not going to work hard.
This is round 2 of my creation of routed bowls. Below are links to a couple of pictorials showing the “making of” a pair of the bowls from round 1.

Round 2 of the routed bowls, in their raw, unfinished state. All will be coated in walnut oil. Yes, that’s a big bag of sawdust on the left side of the photo.

The oil protects the wood and enhances the colors.

This platter is made from oak, maple, walnut and purpleheart.

This serving tray is made from oak, maple and purpleheart.

This bowl is made from maple, red oak, walnut, and koa.
More
Football Snack Bowl
Making A Snowman
Lumberjocks.com: My Projects
 1. When Velda’s comments change from “I love what you’re making” to “Stop tracking sawdust all over my house.”
2. When you can’t work in the shop anymore until you clean it.
3. When you need wood for the next project and you don’t have time to go buy it.
4. When the wood budget begins to resemble a weekend getaway.
5. When a weekend getaway begins to look better than a full rack of wood.
6. When so many tools are spread out you don’t have any place to put your work.
7. When you volunteer to make things for people and they say, “Uh, no.”
8. When watching ACC football sounds better than going to the garage workshop.
9. When watching Grey’s Anatomy sounds better than going to the garage workshop.
10. When the landscaping looks perfect for Hallowe’en … and that’s not a goal.
11. When your hands are numb from all of the sanding. And stay numb after a 5 minute break.
12. When Velda’s placing orders for display pieces to go with her mythical hand-made lotion business.
13. When you realize that you’re working harder than Congress is.
More
From The Shop: Sawdust
Football Snack Bowl
Making A Snowman