Archive for the ‘Woodworking’ Tag
This piece is another routed bowl … made with purpleheart and red oak.
It had to be purple, for my favorite Kansas State fans!

Clamping a 3 layer blank: purpleheart/red oak/purpleheart.

Hogging out the waste in the main bowl.

Following the template to begin the routing.
More
Making A Snowman
I’m not a turner … but I do know something about a router.
Routed bowls. Challenge accepted.

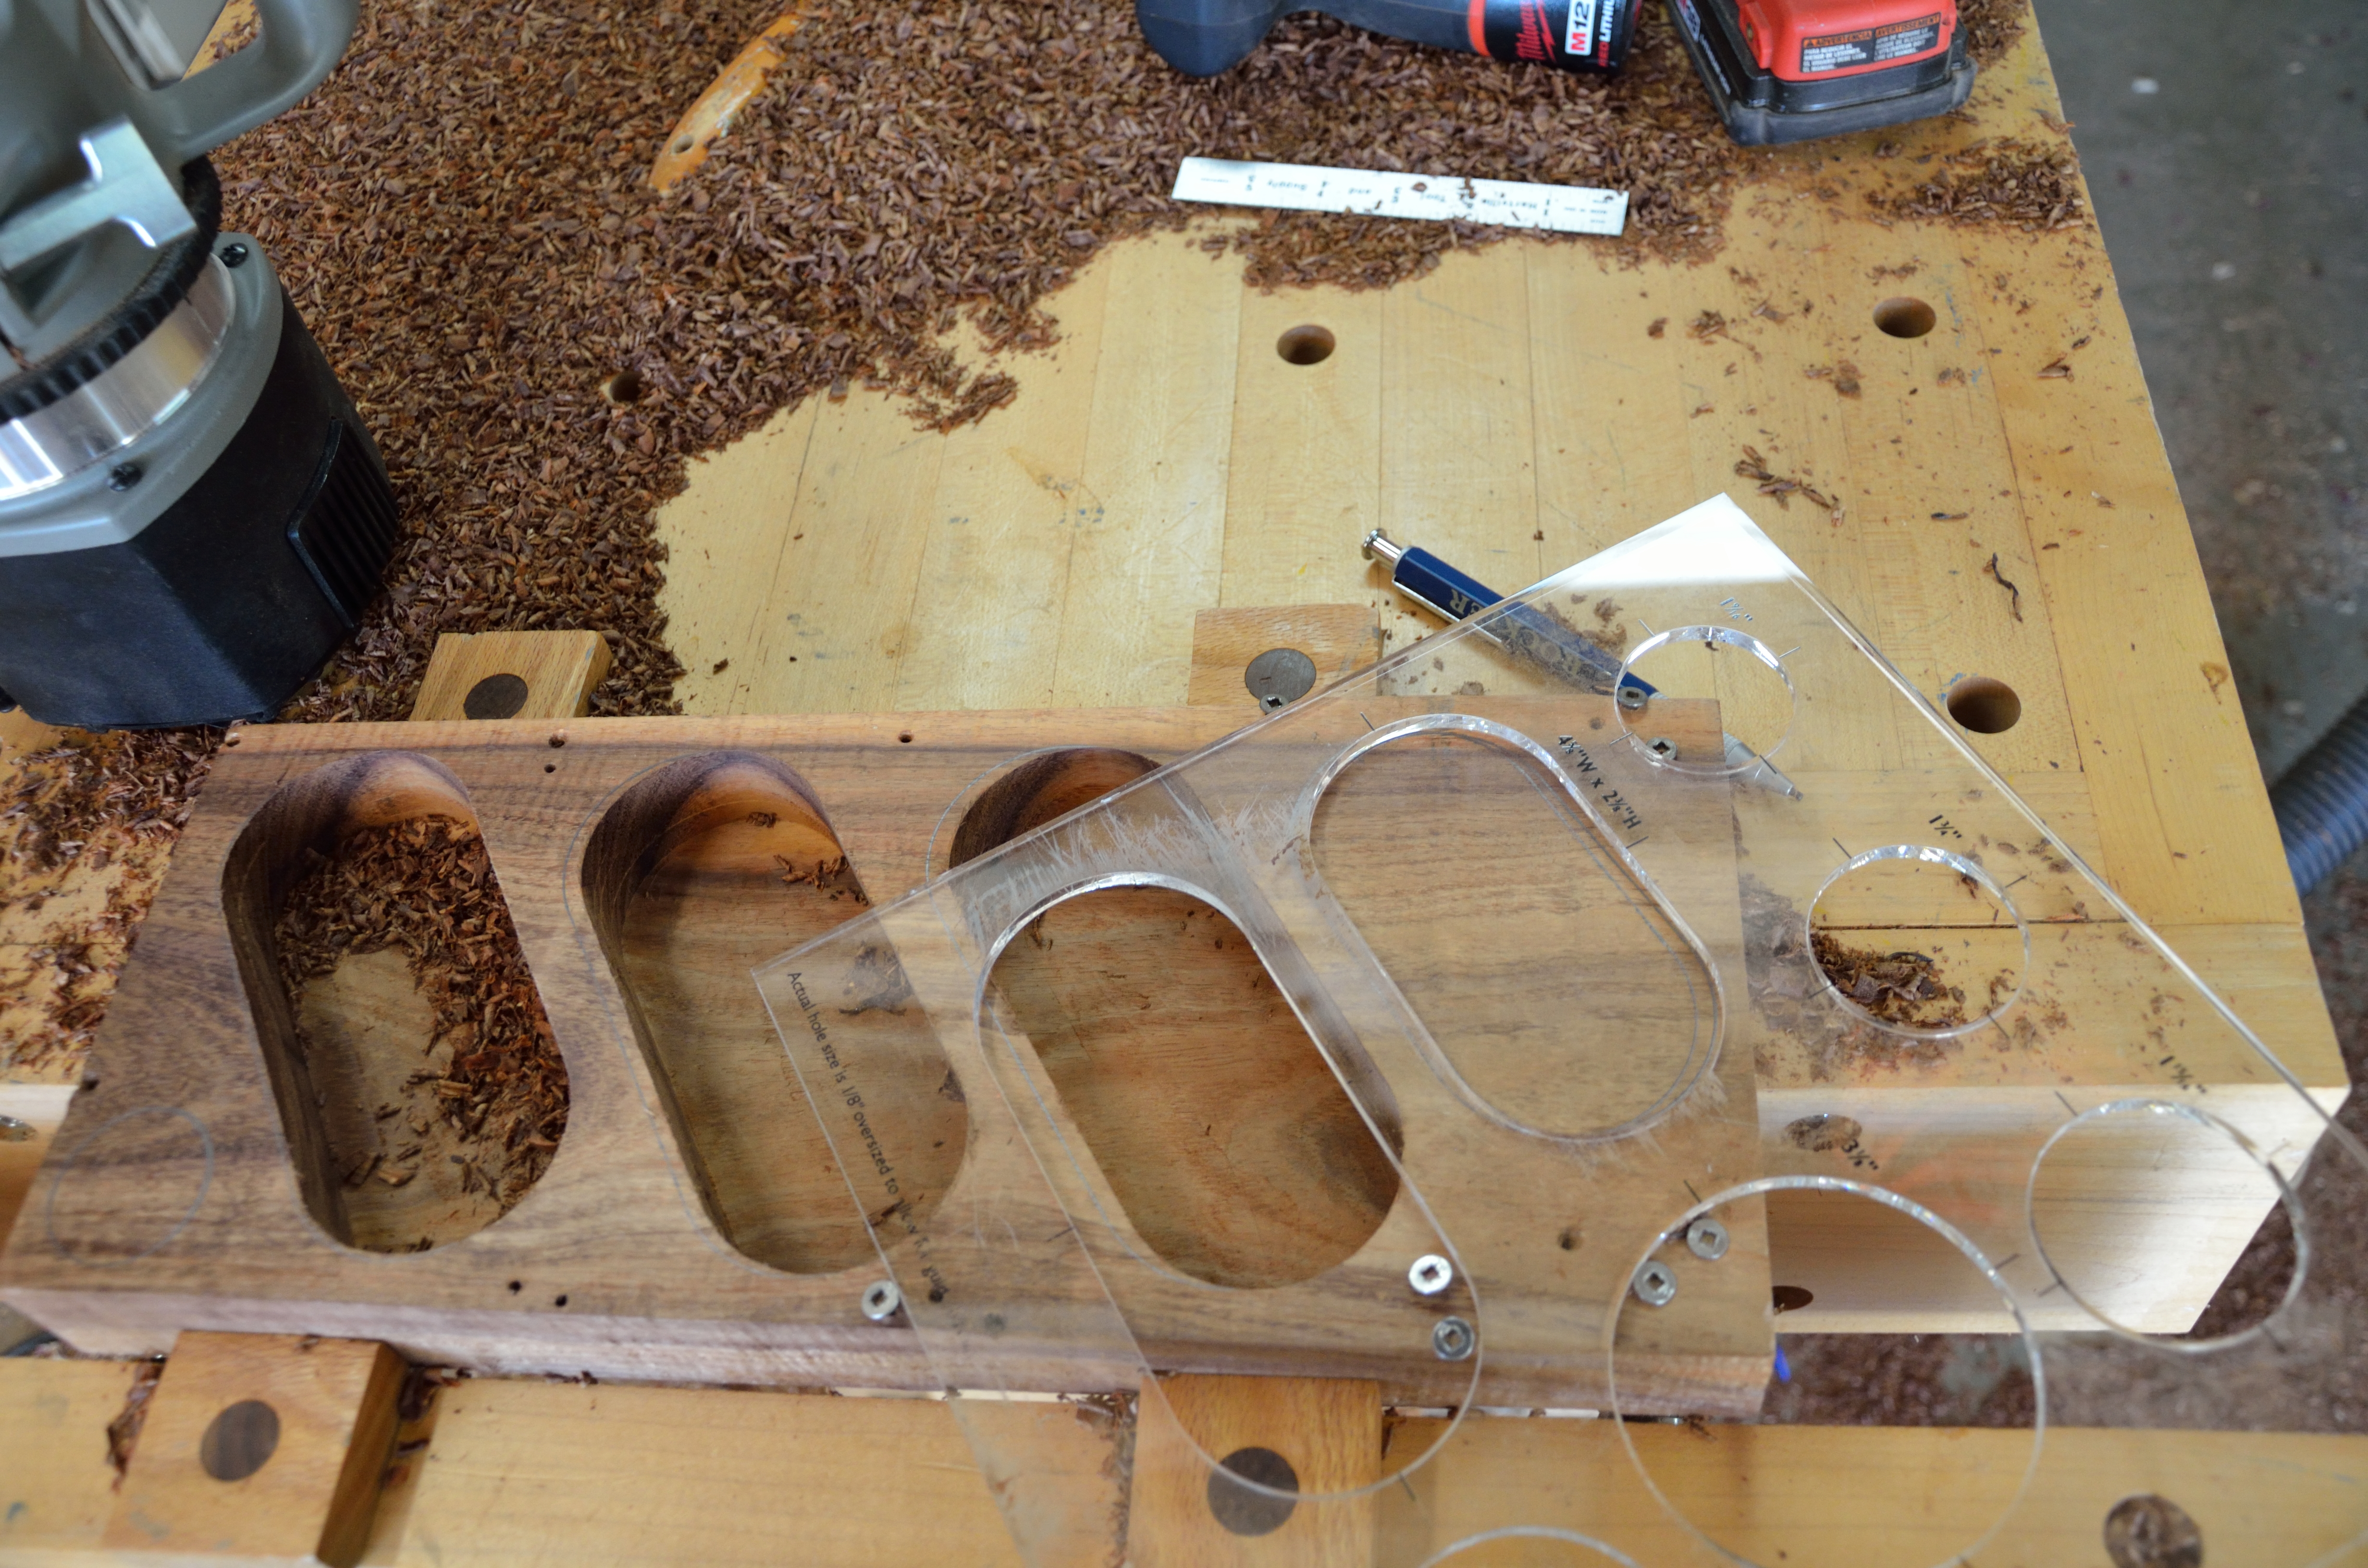
You start with a sandwich of wood: the template screwed into the blank on top, and the wood glued up underneath. The total blank is 19″ x 12″ for this piece. The blank is about 2-1/2″ thick, with a top layer of walnut and a bottom layer of 8/4 red oak.

Use a drill press and a forstner bit to “hog out” the waste inside the shape of the bowl.

Here’s the beginning. The yellow funnel is for the dust collection system, which sucks away the debris during the drilling.

Lots of holes. Go slow; I used a 1-1/2″ bit, so I was removing a lot of waste with each hole.

Here’s the snowman, drilled out to reveal the walnut top and the red oak bowl underneath.

Clamp the bowl down so you can route the bowl shape using a router.

The router has an oversized lexan baseplate installed for this operation.

The cutting edge of the router bit removes the waste while a bearing above the cutters rides on the template to guide the operation.

Carefully follow the template to remove the waste and leave a smooth edge.

Keep the feed rate steady … slow enough to get good results and fast enough to not burn the wood.

Route down to the finished depth of the bowl. Be careful to now route too deeply … ruining the bowl and biting into into the workbench.

Take off the template and trace the outer edge of the bowl.

Use a bandsaw to slice away the wood that isn’t the bowl.

Here’s the head of the snowman after sanding and finishing with walnut oil.

You can never just make just one. Most of these pieces are walnut and red oak. The 4 section bowl is walnut and hard mable. The all brown small, oblong bowls are koa.
More
Mickey & Jed’s Woodworking: Chip & Dip Bowl

When you’re making sawdust, it’s a good weekend.
It is said that there are two kinds of woodworkers. One kind makes things out of wood that is not moving.
The other kind of woodworker believes they should spin a piece of wood at a very high rate of speed, just to see what they can make fly off of it when they poke it with a sharp chisel. They call them turners, and I am not one.
Here’s my favorite turner, my brother-in-law Steve, making my favorite woodworking pencil out of a piece of koa.
Before you cut a board, you need to do 2 things:
1. Make sure you are measuring & marking the boards as accurately as possible before you turn on a machine.
2. Be safe in all that you do.

At the top is a T-square with engraved measurements, from Woodpeckers. Great special purpose tool. The Starrett combination square below it is much more functional, and is always the first tool I grab to mark and measure new stock. The 6″ and 12″ steel rules are also shop essentials. Two pencils here: the one on the left is always at the table saw, and was made for me by my brother-in-law. The one on the right uses smaller lead, and is more accurate for layouts.

So many tools here! Triangles, a square, a combination square … a pencil.

A compass lets you draw a circle; this one has an extension arm allowing circles up to 12″ in diameter to be marked.

You need 2 identical tape measures: one lives on the table saw, and the other is at the work site.

SAFETY. I always use safety goggles and a push stick on the table saw. Always. Hearing protection is required with a planer or jointer; some use it with a router or table saw as well.
My garage hasn’t seen a car in many years. What it does see is woodworking.
Here are the key floor and bench top tools that I use. I’ve built everything from our kitchen cabinets to curio boxes. Check out some of my work on my woodworking blog, which is a part of the Lumberjocks website. See my projects, here.

The workbench is the centerpiece of every project in the shop. I built this one with holes across the hard maple top. With the end vise (on the other end), I can clamp large projects using “bench dogs” in the holes to hold the piece in place.

The most important power tool in the shop. The table saw is the most versatile, and the most dangerous, of the tools I use.

My benchtop bandsaw gets the job done, almost, on this 1-1/2″ stock. If only I had room for a real band saw….

Making relief cuts on the radius of the circle makes for a much smoother arc to be cut in the stock.

The router table is a wonderful addition to the shop, but the best thing for better quality of life in the shop is a dust collector, shown inflated to the left. Now, operating the table saw or router table is almost dust free.

The router table also has a mitre guage mounted over the fence for easy work routing at a 90* angle.

This router table top was made by Jessem and sold by Rockler … but it has been discontinued. It’s my # 2 go to tool, after the table saw.

The drill press is essential for drilling holes at a 90* angle to the stock; you can’t match it with a handheld drill. In this case, I was using a 1-1/2″ forstner bit, which couldn’t be used in a handheld drill.

The benchtop sander makes quick work of corners and rough edges.